How to Start Your Own Vegetable Plot
Our work experience placement student Hazel is sharing her tips on preparing a vegetable plot to grow your own vegetables at home. Due to Covid-19 her placement was cancelled so instead she is sharing her family's experience on growing your own vegetables. We love how Hazel and her family have made use of their front garden, often a space that doesn't get used so why not use their inspiration to start your own veggie plot?
As a family we are trying to find ways to be more eco-friendly, and one way we are doing this is by growing our own fruit and veg. We have always grown a few things like strawberries and potatoes but over lockdown we decided to convert our front garden into a vegetable patch.
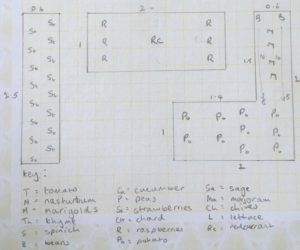
We started by making a list of what we wanted to grow and measured the sizes that each raised bed would need to be. Part of our planning was thinking about companion planting, which is planting crops together which like the same conditions and help to protect one another from pests. We also had to think about how much of each crop would fit into the space.
This is the final plan we made:

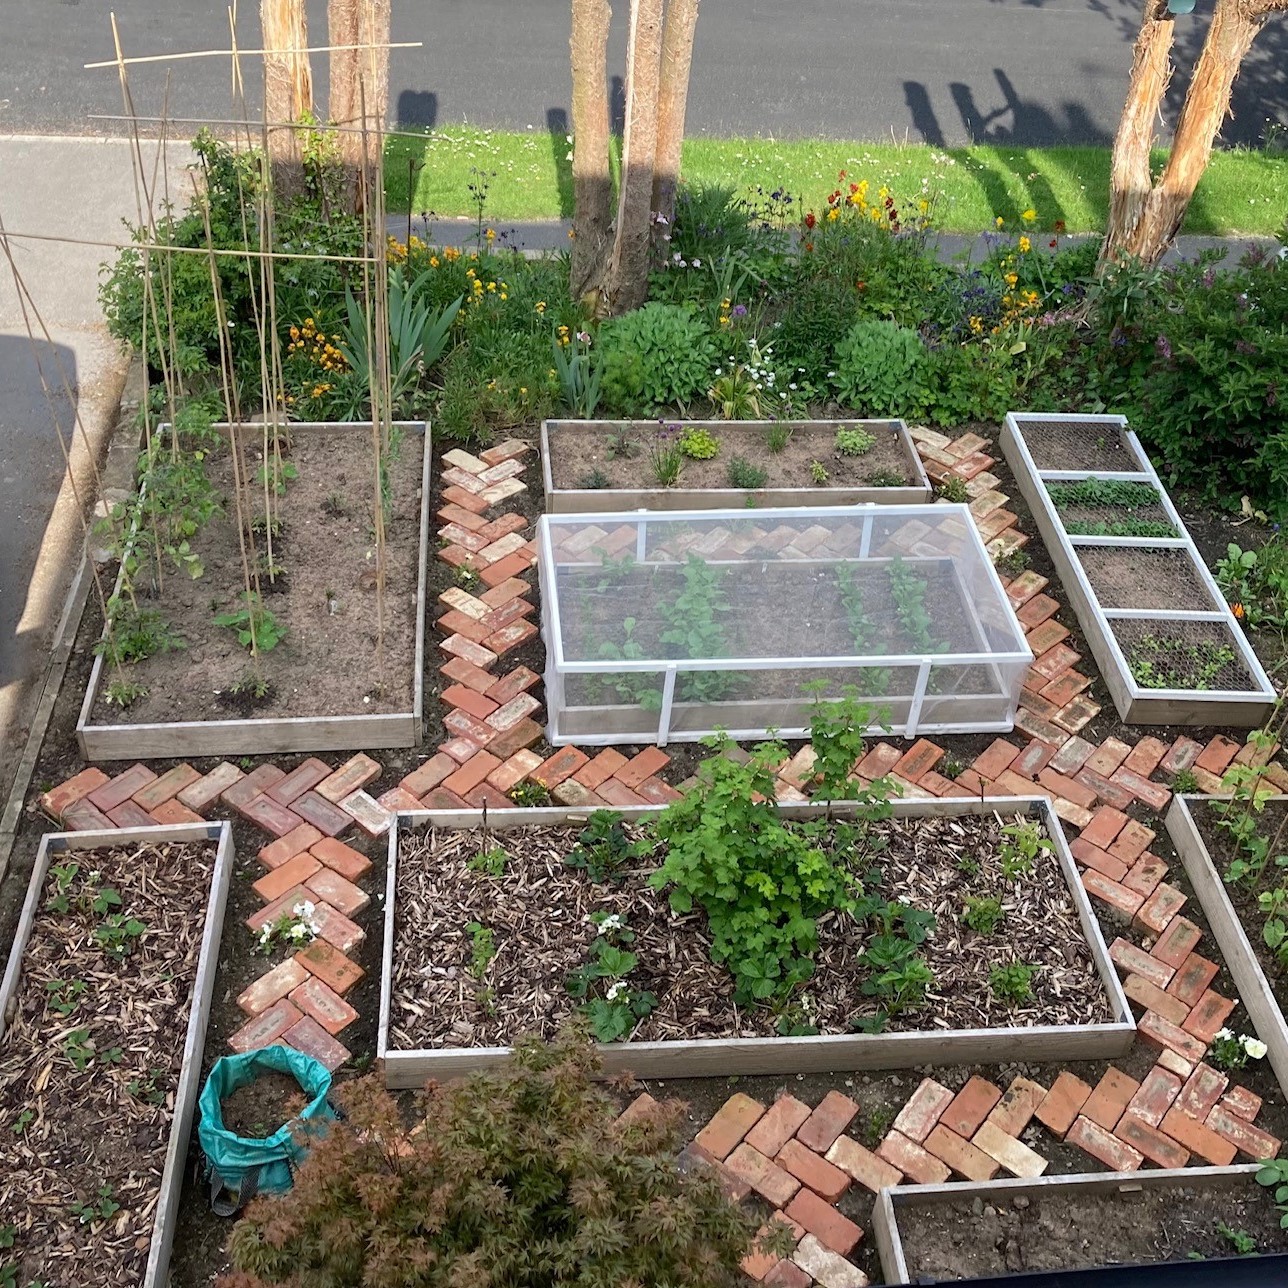
The space was originally a lawn with a few flower beds, so firstly we removed the grass and buried it under the soil so that it would compost. For the beds, we decided on cedar because it’s a long lasting wood, but there are many options available including recycled plastic planks or scrap wood. We ordered some bulk bags of compost to fill the beds to make sure the plants had the correct nutrients. For the paths we decided to use local reclaimed bricks, and we are planting flowers and low growing herbs in the gaps.
We decided the best option for us was to grow most things from seed. We grew all of our seeds indoors, following the instructions on the seed packets. The seeds we could start first, in February, were carrots, tomatoes and marigolds, and some of the last seeds to get sewn we planted in April. This does vary depending on the weather, the conditions the seeds are in, and the variety of seeds you get.
This spring was very cold, so we couldn’t plant the seedlings outside for quite a while. Once the risk of frost was over, we started hardening off the seedlings. This is when you take the plants outside during the day but bring them back in overnight for about a week so that they can adjust to the colder temperature before planting them in the ground. Some plants such as the runner beans are more hardy so they could go out earlier, but others, like the tomatoes, are more prone to cold damage so they need to stay indoors for longer.
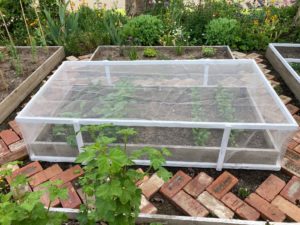
We are trying to make our veg patch as eco-friendly as possible, so we’ve decided not to use chemical pesticides. This does mean that we will have slightly less end crop, but it will help to increase biodiversity in our garden. We have always tried to make our garden as wildlife friendly as possible, and we hope this approach will help provide a balance between pets and predators. We are also using nets to try and keep the pests off, and so far this has been very successful.
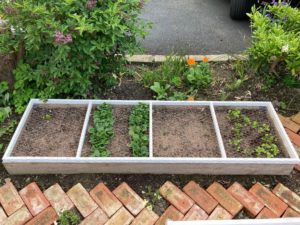
Because carrots and parsnips are slow growing crops, we also had space to plant some radishes between the rows in that bed because they grow quickly and can be harvested early in the season before the other veg establish. We enjoyed our first harvest of radishes before we planted our tomatoes!
As we are new to this, there was a lot of experimenting, and we didn’t always get things right. For example, our tomato seedlings started well but didn’t grow well and a lot of them died. This meant we had to adapt our plan slightly and we bought some well established young plants from a garden centre instead.
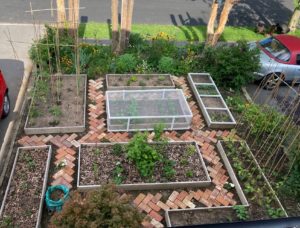
This is what the garden currently looks like (at the end of may)